备份数据库
概述
本文档详细介绍了如何备份 WordPress 数据库,包括使用 cPanel、phpMyAdmin、MySQL/MariaDB 命令、MySQL Workbench 和插件等多种方法。强调定期备份的重要性,并区分数据库备份与完整站点备份。
关键要点
- 强烈建议定期升级前备份数据库,以防故障恢复。
- 数据库备份仅包含帖子、页面、评论、设置等,不包含主题、插件、上传文件或 wp-config.php 等文件。
- 备份通常生成 .sql、.gz 或 .bz2 等导出文件,需导入 MySQL/MariaDB 进行恢复。
- 提供多种备份工具:cPanel X、phpMyAdmin(快速和自定义备份)、MySQL/MariaDB 命令、MySQL Workbench 和 WordPress 插件(如 WP-DB-Backup)。
- 恢复过程包括使用 phpMyAdmin 或 MySQL/MariaDB 命令导入备份文件,并注意错误处理。
代码示例
mysqldump --add-drop-table -h db01.example.net -u dbocodex -p wp > blog.bak.sql注意事项
- 使用 cPanel 时,避免生成完整备份,因其仅用于归档,无法通过 cPanel 恢复。
- phpMyAdmin 可能无法处理大型数据库,此时建议使用 MySQL/MariaDB 命令。
- 恢复备份前,确保目标数据库为空或使用 DROP TABLE 语句删除现有表。
- 备份文件可压缩(如使用 gzip 或 bzip2),但需权衡压缩效率与速度。
Backing Up Your Database
It is strongly recommended that you backup your database at regular intervals and before an upgrade.
Restoring your database from backup is then possible if something goes wrong.
NOTE: The steps below back up the WordPress database (posts, pages, comments, settings, etc.) but they do not back up your WordPress files (themes, plugins, uploads, wp-config.php, etc.). For a full-site backup, see WordPress Backups and Backing Up Your WordPress Files.
When you back up a database, you usually create an export file (for example, a .sql, .gz, or .bz2). That export file can be stored with your file backups so the database and files stay together as one “backup set”, but restoring still requires importing it into MySQL/MariaDB.
Backup using cPanel X
cPanel is a popular control panel used by many web hosts. The backup feature can be used to backup your MySQL database. Do not generate a full backup, as these are strictly for archival purposes and cannot be restored via cPanel. Look for ‘Download a MySQL Database Backup’ and click the name of the database. A *.gz file will be downloaded to your local drive.
There is no need to unzip this file to restore it. Using the same cPanel program, browse to the gz file and upload it. Once the upload is complete, the bottom of the browser will indicate dump complete. If you are uploading to a new host, you will need to recreate the database user along with the matching password. If you change the password, make the corresponding change in the wp-config.php file.
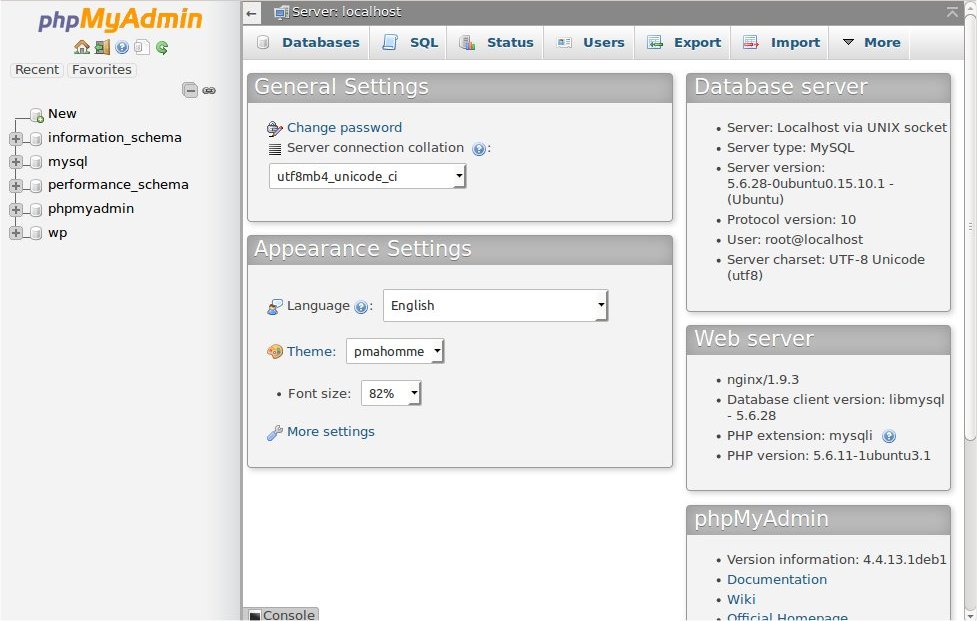
Using phpMyAdmin
phpMyAdmin is the name of the program used to manipulate your database.
Information below has been tried and tested using phpMyAdmin version 4.4.13 connects to MySQL version 5.6.28 running on Linux.
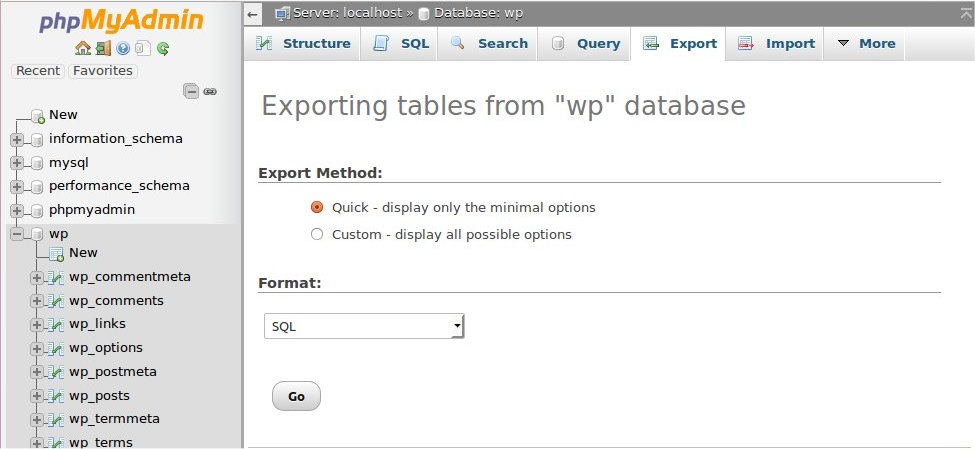
Quick backup process
When you backup all tables in the WordPress database without compression, you can use simple method. To restore this backup, your new database should not have any tables.
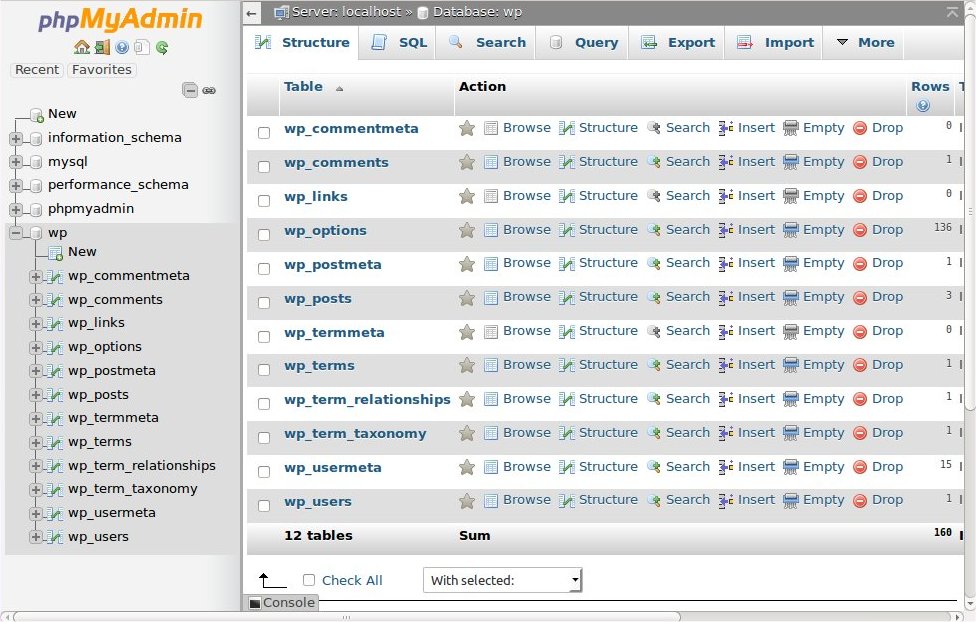
- Log into phpMyAdmin on your server
- From the left side window, select your WordPress database. In this example, the name of database is “wp”.
- The right side window will show you all the tables inside your WordPress database. Click the ‘Export’ tab on the top set of tabs.
- Ensure that the Quick option is selected, and click ‘Go’ and you should be prompted for a file to download. Save the file to your computer. Depending on the database size, this may take a few moments.
Custom backup process
If you want to change default behavior, select Custom backup. In above Step 4, select Custom option. Detailed options are displayed.
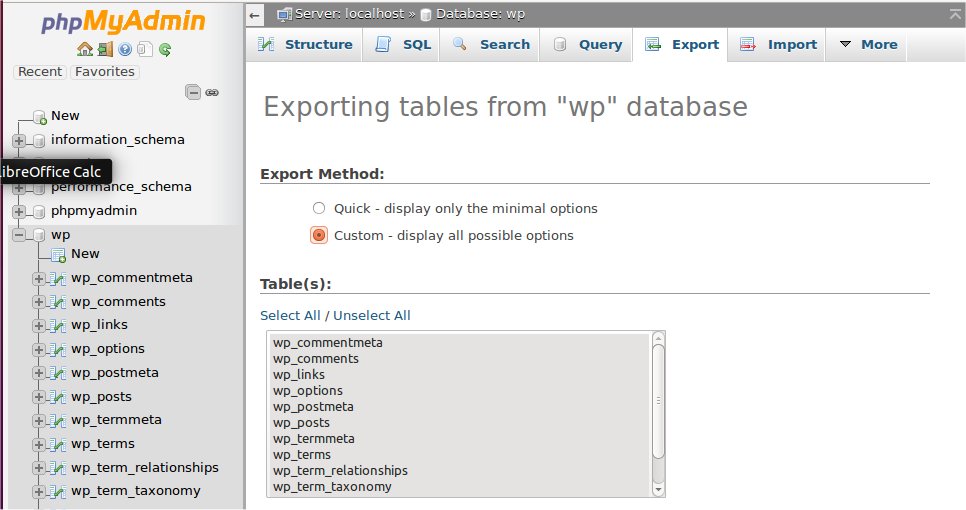
The Table section
All the tables in the database are selected. If you have other programs that use the database, then choose only those tables that correspond to your WordPress install. They will be the ones with that start with “wp_” or whatever ‘table_prefix’ you specified in your ‘wp-config.php’ file.
If you only have your WordPress blog installed, leave it as is (or click ‘Select All’ if you changed the selection)
The Output section
Select ‘zipped’ or ‘gzipped’ from Compression box to compress the data.

The Format section
Ensure that the SQL is selected. Unlike CSV or other data formats, this option exports a sequence of SQL commands.
In the Format-specific options section, leave options as they are.
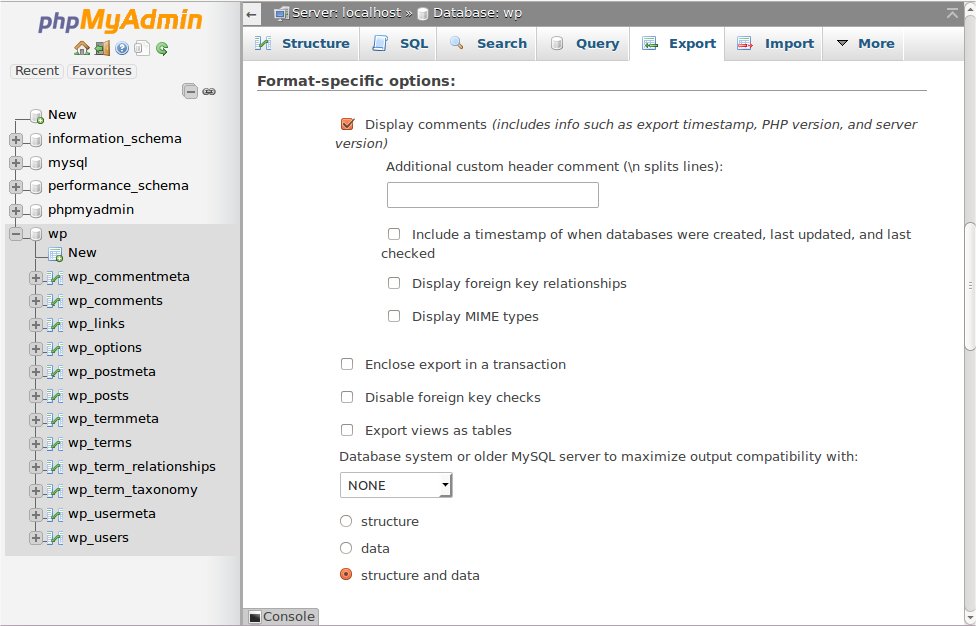
The Object creation options section
Select Add DROP TABLE / VIEW / PROCEDURE / FUNCTION / EVENT / TRIGGER statement. Before table creation on target database, it will call DROP statement to delete the old existing table if it exist.

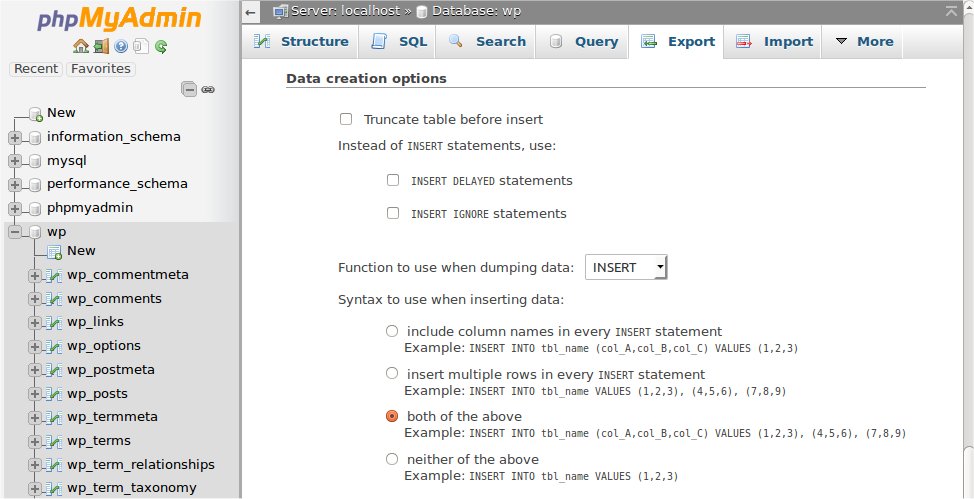
The Data creation options section
Leave options as they are.
Now click ‘Go’ at the bottom of the window and you should be prompted for a file to download. Save the file to your computer. Depending on the database size, this may take a few moments.
Remember – you have NOT backed up the files and folders – such as images – but all your posts and comments are now safe.
Using Straight MySQL/MariaDB Commands
phpMyAdmin cannot handle large databases so using straight MySQL/MariaDB code will help.
Change your directory to the directory you want to export backup to:
user@linux:~> cd files/blog
user@linux:~/files/blog>
Use the mysqldump command with your MySQL server name, user name and database name. It prompts you to input password (For help, try: man mysqldump).
To backup all database tables
mysqldump --add-drop-table -h mysql_hostserver -u mysql_username -p mysql_databasename
To backup only certain tables from the database
mysqldump --add-drop-table -h mysql_hostserver -u mysql_username -p mysql_databasename
Example:
user@linux:~/files/blog> mysqldump --add-drop-table -h db01.example.net -u dbocodex -p wp > blog.bak.sql
Enter password: (type password)
Use bzip2 to compress the backup file
user@linux:~/files/blog> bzip2 blog.bak.sql
You can do the same thing that above two commands do in one line:
user@linux:~/files/blog> mysqldump --add-drop-table -h db01.example.net -u dbocodex -p wp | bzip2 -c > blog.bak.sql.bz2
Enter password: (type password)
The bzip2 -c after the | (pipe) means the backup is compressed on the fly, and the > blog.bak.sql.bz2 sends the bzip output to a file named blog.bak.sql.bz2.
Despite bzip2 being able to compress most files more effectively than the older compression algorithms (.Z, .zip, .gz), it is considerably slower (compression and decompression). If you have a large database to backup, gzip is a faster option to use.
user@linux:~/files/blog> mysqldump --add-drop-table -h db01.example.net -u dbocodex -p wp | gzip > blog.bak.sql.gz
Using MySQL Workbench
MySQL Workbench (formerly known as My SQL Administrator) is a program for performing administrative operations, such as configuring your MySQL server, monitoring its status and performance, starting and stopping it, managing users and connections, performing backups, restoring backups and a number of other administrative tasks.
You can perform most of those tasks using a command line interface such as that provided by mysqladmin or mysql, but MySQL Workbench is advantageous in the following respects:
- Its graphical user interface makes it more intuitive to use.
- It provides a better overview of the settings that are crucial for the performance, reliability, and security of your MySQL servers.
- It displays performance indicators graphically, thus making it easier to determine and tune server settings.
- It is available for Linux, Windows and MacOS X, and allows a remote client to backup the database across platforms. As long as you have access to the MySQL databases on the remote server, you can backup your data to wherever you have write access.
- There is no limit to the size of the database to be backed up as there is with phpMyAdmin.
Information below has been tried and tested using MySQL Workbench version 6.3.6 connects to MySQL version 5.6.28 running on Linux.
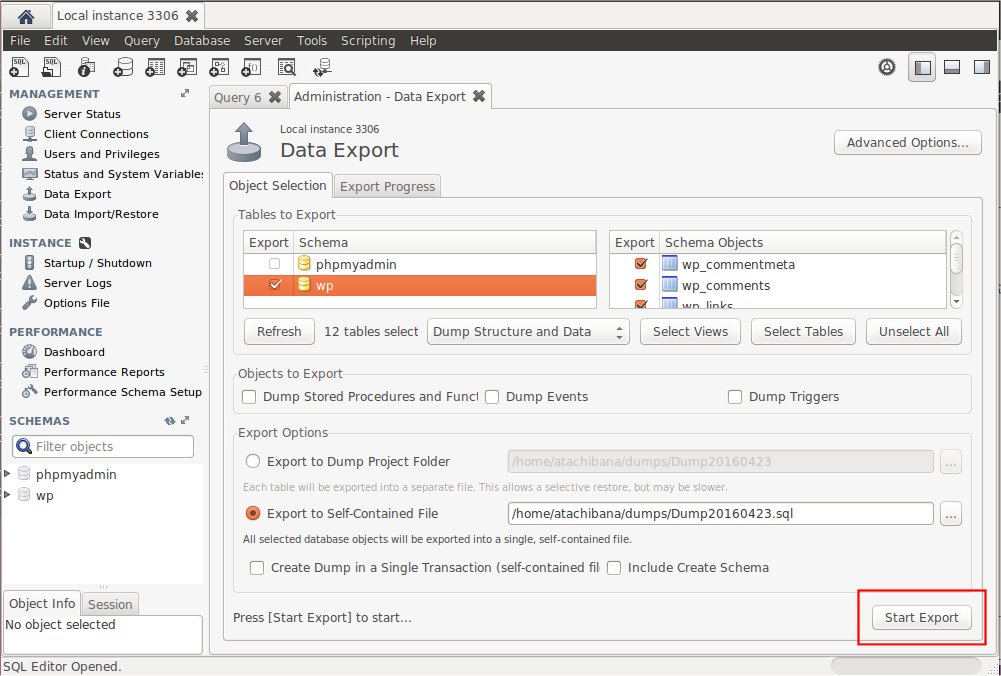
Backing Up the Database
This assumes you have already installed MySQL Workbench and set it up so that you can login to the MySQL Database Server either locally or remotely. Refer to the documentation that comes with the installation package of MySQL Workbench for your platform for installation instructions or online document.
- Launch the MySQL Workbench
- Click your database instance if it is displayed on the top page. Or, Click Database -> Connect Database from top menu, enter required information and Click OK.
- Click Data Export in left side window.
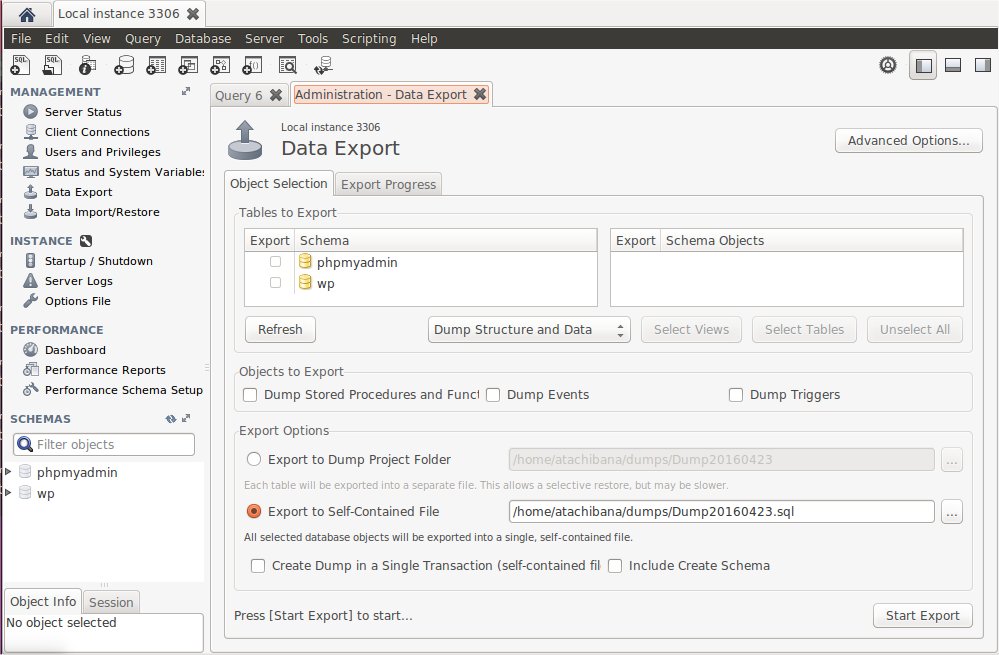
- Select your WordPress databases that you want to backup.
- Specify target directory on Export Options. You need write permissions in the directory to which you are writing the backup.
- Click Start Export on the lower right of the window.
Restoring From a Backup
- Launch the MySQL Workbench
- Click your database instance if it is displayed on the top page. Or, Click Database -> Connect Database, and Click OK.
- Click Data Import/Restore in left side window.
- Specify folder where you have backup files. Click “…” at the right of Import from Dump Project Folder, select backup folder, and click Open.
- Click Start Import on the lower right of the window. The database restore will commence.

MySQL GUI Tools
In addition to MySQL Workbench, there are many GUI tools that let you backup (export) your database.
| Name | OS (Paid edition) | OS (Free edition) | |
|---|---|---|---|
| MySQL Workbench | Windows/Mac/Linux | Windows/Mac/Linux | See above |
| EMS SQL Management Studio for MySQL | Windows | ||
| Aqua Data Studio | Windows/Mac/Linux | Windows/Mac/Linux (14 days trial) | Available in 9 languages |
| Navicat for MySQL | Windows/Mac/Linux | Windows/Mac/Linux (14 days trial) | Available in 8 languages |
| SQLyog | Windows | ||
| Toad for MySQL | Windows | ||
| HeidiSQL | Windows | ||
| Sequel Pro | Mac | CocoaMySQL successor | |
| Querious | Mac |
Using WordPress Database Backup Plugin
You can find plugins that can help you back up your database in the WordPress Plugin Directory.
The instructions below are for the plugin called WP-DB-Backup:
Installation
- Search for “WP-DB-Backup” on Administration > Plugins > Add New.
- Click Install Now.
- Activate the plugin.
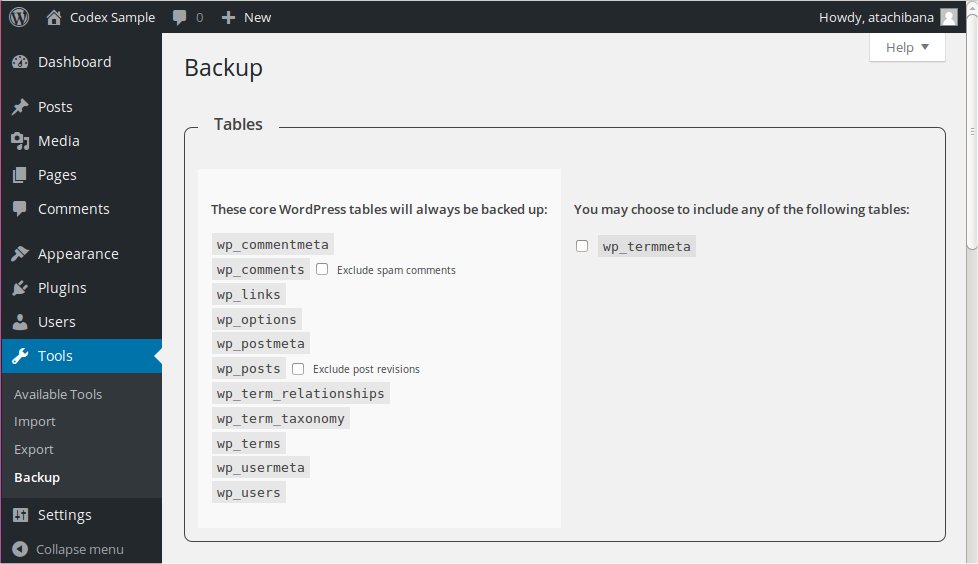
Backing up
- Navigate to Administration > Tools > Backup
- Core WordPress tables will always be backed up. Select some options from Tables section.
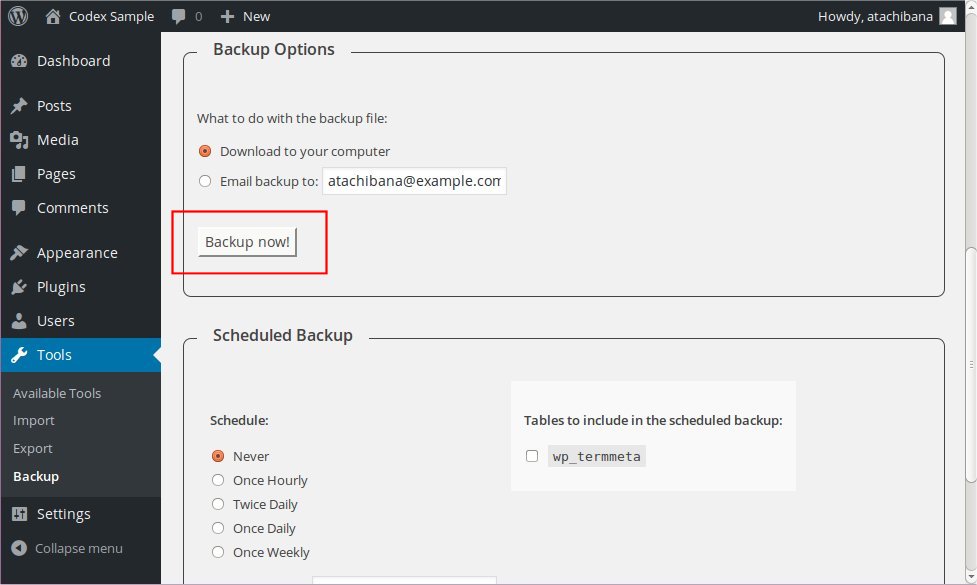
- Select the Backup Options; the backup can be downloaded, or emailed.
-
Finally, click on the Backup Now! button to actually perform the backup. You can also schedule regular backups.
Restoring the Data
The file created is a standard SQL file. If you want information about how to upload that file, look at Restoring Your Database From Backup.
More Resources
External Resources
Restoring Your Database From Backup
Using phpMyAdmin
phpMyAdmin is a program used to manipulate databases remotely through a web interface. A good hosting package will have this included. For information on backing up your WordPress database, see Backing Up Your Database.
Information here has been tested using phpMyAdmin 4.0.5 running on Unix.
The following instructions will replace your current database with the backup, reverting your database to the state it was in when you backed up.
Restore Process
Using phpMyAdmin, follow the steps below to restore a MySQL/MariaDB database.
- Login to phpMyAdmin.
- Click “Databases” and select the database that you will be importing your data into.
- You will then see either a list of tables already inside that database or a screen that says no tables exist. This depends on your setup.
- Across the top of the screen will be a row of tabs. Click the Import tab.
- On the next screen will be a location of text file box, and next to that a button named Browse.
- Click Browse. Locate the backup file stored on your computer.
- Make sure SQL is selected in the Format drop-down menu.
- Click the Go button.
Now grab a coffee. This bit takes a while. Eventually you will see a success screen.
If you get an error message, your best bet is to post to the WordPress support forums to get help.
Using MySQL/MariaDB Commands
The restore process consists of unarchiving your archived database dump, and importing it into your MySQL/MariaDB database.
Assuming your backup is a .bz2 file, created using instructions similar to those given for Backing up your database using MySQL/MariaDB commands, the following steps will guide you through restoring your database:
- Unzip your
.bz2file:
user@linux:~/files/blog> bzip2 -d blog.bak.sql.bz2
Note: If your database backup was a .tar.gz file called blog.bak.sql.tar.gz, then
tar -zxvf blog.bak.sql.tar.gz
is the command that should be used instead of the above.
- Put the backed-up SQL back into MySQL/MariaDB:
user@linux:~/files/blog> mysql -h mysqlhostserver -u mysqlusername -p databasename < blog.bak.sql
Enter password: (enter your mysql password)
user@linux:~/files/blog>