如何使用 WordPress Playground 创建交互式演示
WordPress Playground 的 JavaScript API 是一个面向开发者的工具,它开启了一个充满可能性的新世界。它支持创建复杂的独立实例,使其特别适合展示主题或插件(或两者),并准备超越纯文本文档、提供交互层的 WordPress 指南。
如果你还不熟悉 Playground,请先阅读前一篇文章:Playground 简介:在浏览器中运行 WordPress。为了充分利用本教程,你需要理解驱动 Playground 的三个 API 的模块化特性,以及它们如何允许你共享主题、插件甚至包含内容的完整网站。
你将构建什么?
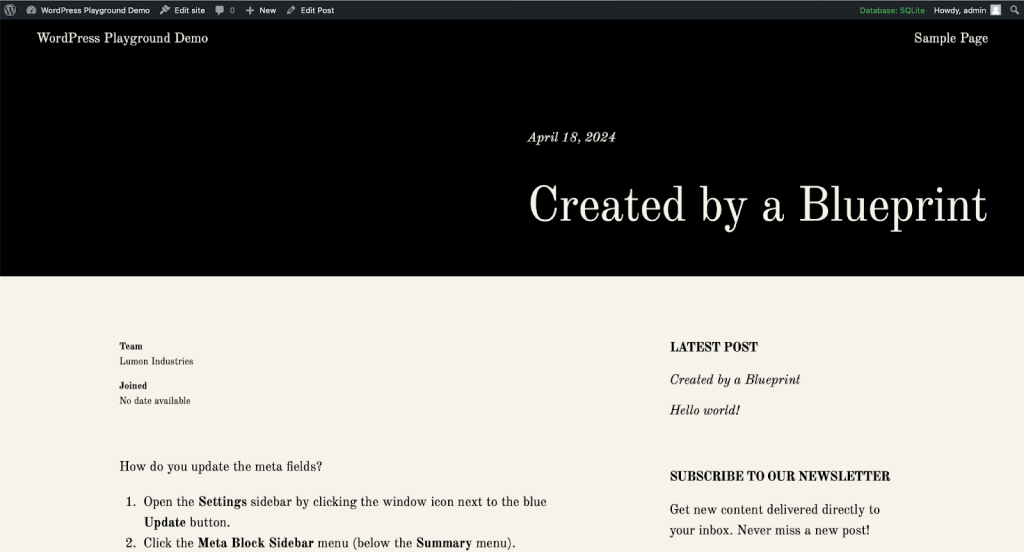
本项目灵感来源于一个常见用例:演示一个自定义插件与一个适配其功能的主题如何协同工作和显示。此场景需要一个手册,指导用户如何以及在何处设置插件自定义字段中显示的数据。使用 Playground 启动一个带有分步指南的实时站点,可以使体验更具吸引力。
├── playground
│   ├── zips
│   │   ├── blue-note.zip
│   │   ├── meta-block-sidebar.zip
│   ├── blueprint.json
│   ├── index.html
├── plugins
│   │   ├── meta-block-sidebar
│   │   │   ├── PLUGIN FILES...
├── themes
│   │   ├── blue-note
│   │   │   ├── THEME FILES...
├── README.md
你可以在为本教程创建的 GitHub 仓库 中找到代码。项目包含主题和插件的源文件,以及 Playground 使用的压缩文件。在继续之前,请克隆或手动创建它。
创建蓝图
让我们从每个 Playground 项目的基石开始:blueprint.json 文件。如果你没有克隆仓库,请将以下代码复制并粘贴到你的文件中:
{
	"$schema": "https://playground.wordpress.net/blueprint-schema.json",
	"preferredVersions": {
		"php": "latest",
		"wp": "latest"
	},
	"siteOptions": {
		"blogname": "WordPress Playground Demo"
	},
	"plugins": [
		"create-block-theme",
		"https://raw.githubusercontent.com/wptrainingteam/playground-demo-handover/main/playground/zips/meta-block-sidebar.zip"
	],
	"steps": [
		{
			"step": "installTheme",
			"themeZipFile": {
				"resource": "url",
				"url": "https://raw.githubusercontent.com/wptrainingteam/playground-demo-handover/main/playground/zips/blue-note.zip"
			}
		},
		{
			"step": "runPHP",
			"code": "<?php require_once('/wordpress/wp-load.php'); wp_insert_post(array( 'post_title' => 'Created by a Blueprint', 'post_content' => '<!-- wp:paragraph --><p>How do you update the meta fields?</p><!-- /wp:paragraph --><!-- wp:list --><ol><!-- wp:list-item --><li>Open the <strong>Settings</strong> sidebar by clicking the window icon next to the blue <strong>Update</strong> button.</li><!-- /wp:list-item --><!-- wp:list-item --><li>Click the <strong>Meta Block Sidebar</strong> menu (below the <strong>Summary</strong> menu).</li><!-- /wp:list-item --><!-- wp:list-item --><li>Type the <strong>Team name</strong> and the <strong>date</strong> the person joined the company in the respective fields.</li><!-- /wp:list-item --><!-- wp:list-item --><li>Click the blue <strong>Update</strong> button.</li><!-- /wp:list-item --></ol><!-- /wp:list -->','post_status' => 'publish' ));"
		}
	],
	"features": {
		"networking": true
	},
	"login": true,
	"landingPage": "/?p=4"
}
让我们花点时间解释一下 Playground 将为你执行的不同步骤:
- 启动后,Playground 将创建一个 WordPress 实例,使用支持的最新 PHP 和 WordPress 版本。
- 然后,它将重命名站点。
- 安装并激活两个插件:Create Block Theme(可在插件目录中找到,因此使用其
slug获取)和自定义的 Meta Block Sidebar(在同一 GitHub 仓库中可用,因此从相应的URL获取)。 - 安装并激活 Blue Note 主题 的适配版本(从同一 GitHub 仓库获取)。
- 创建一个包含分步指南的文章。
- 启用网络模式。
- 以管理员身份登录站点。
- 最后,打开站点并显示新创建的文章。
这个小用户手册使用 WordPress 的 wp_insert_post 函数 将内容和 HTML 块标记打包在一起。这种方法适用于短代码片段,但探索 Playground 更强大的替代方案更为明智:
- 使用
importWxr步骤 导入 XML 文件,或 - 使用同名的
wp-cli步骤 通过 WP-CLI 生成文章。
简写语法
本教程中的蓝图利用了 Playground 的简写语法,使这组指令不那么冗长。目前支持的步骤有:login、plugins、siteOptions 和 defineWpConfigConsts。查看文档 以了解更多关于如何以及何时使用这些简写语法代替显式步骤的信息。
测试蓝图
现在是暂停、实验并熟悉蓝图的好时机。复制上面的代码并将其粘贴到官方的 蓝图编辑器(仍在开发中)。你的实例应该与 原始演示 完全相同。
为了具体感受可能性,尝试在蓝图编辑器中修改一些值——也许是 landingPage 的值(将 /?p=4 替换为 /?p=1)或 blogname。如果出现问题,撤销更改,修复编辑器提示的任何错误,然后再次点击 Run it 按钮。
如何在蓝图中加载资源?
Playground 需要能够访问你的文件才能运行它们。这可以通过几种方式实现:通过你的自定义域名、GitHub 仓库等。前者显然更有意义,但浏览器的安全限制意味着你需要在服务器上处理任何跨源资源共享(CORS)问题。一个更快的方法是使用 GitHub 的特殊 raw.githubusercontent.com 域名。
为了防止 CORS 相关错误,请将你的仓库设为 公开,并使用以下模式将 Playground 指向文件的绝对路径:https://raw.githubusercontent.com/
{USER}/{REPO}/{BRANCH}/PATH/TO/FILE
如果你的仓库是 私有的,你只能通过自定义域名访问 Playground 实例。
Playground 的浏览器内编辑器是一个宝贵的测试工具。它也是开始根据你的需求调整原始示例的最快方式。当你感觉足够自信时,可以用它来原型化你的项目,而不是在本地机器上繁琐地调整 JSON,并希望一切都完全正确。
根据你的项目主题和插件修改文件名和目录结构——别忘了更新文件路径并将所有内容同步到 GitHub,以便文件在线可用(参见上面的 CORS 部分)。当你对结果满意时,将代码复制到你的 blueprint.json 文件中。
你可以使用 Playground 的 Query API 分享项目。以下是示例项目的 URL 样子(点击在新标签页中打开):
使用 JavaScript API
到目前为止,你还没有真正使用 JavaScript API;让我们看看如何利用其最强大的功能:启动 Playground API 客户端。创建一个 index.html 文件,并复制粘贴以下代码:
<!DOCTYPE html>
<html lang="en">
<head>
<meta charset="UTF-8">
<meta name="viewport" content="width=device-width, initial-scale=1.0">
<title>Demo Handover Playground</title>
<style>
body {
display: grid;
place-items: center;
background: linear-gradient(deeppink, darkorange);
}
header {
font-size: 1em;
font-family: monospace;
display: flex;
align-items: baseline;
gap: 1rem;
}
iframe#wp-playground {
width: 100%;
height: 100dvh;
border: 2px solid currentColor;
}
</style>
</head>
<body>
<header>
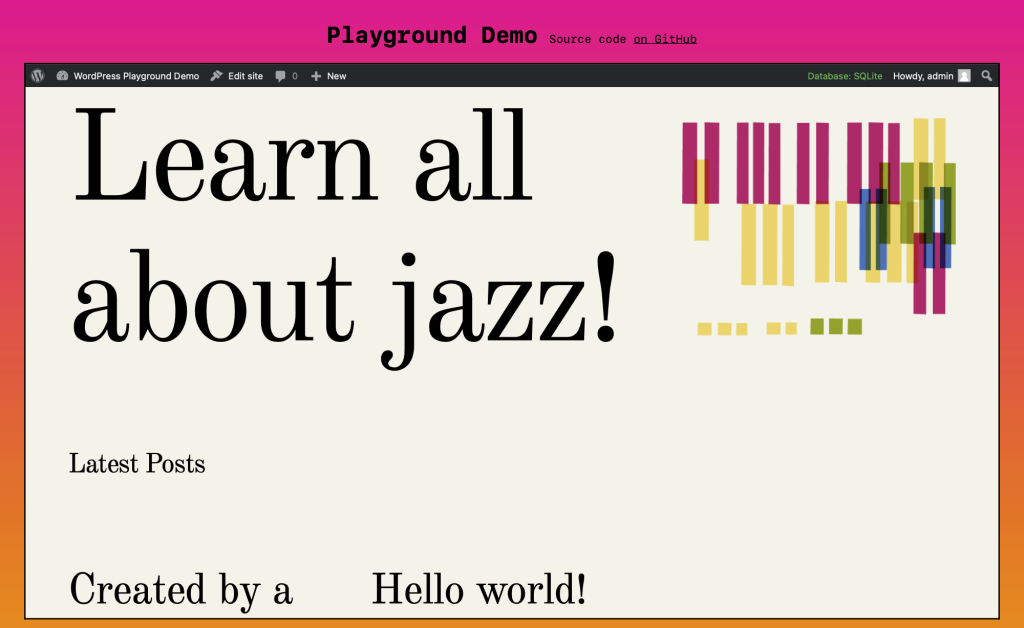
<h1>Playground Demo</h1>
<p>Source code <a href="https://github.com/wptrainingteam/playground-demo-handover" target="_blank"
rel="noopener">on GitHub</a>
</p>
</header><iframe id="wp-playground" title="Playground Demo Site"></iframe>
<script type="module">
import { startPlaygroundWeb } from 'https://playground.wordpress.net/client/index.js'; const client = await startPlaygroundWeb({
iframe: document.getElementById('wp-playground'),
remoteUrl: `https://playground.wordpress.net/remote.html`,
blueprint: {},
});
</script>
</body>
</html>client 对象将通过项目的 remote.html 文件加载到 iframe 中——此 API 唯一允许的“端点”——并运行 blueprint 变量中提供的步骤,利用 Blueprint API 根据你的特定设置配置客户端。
使用 JavaScript API(而不是加载 iframe)的一个有益副作用是,你无需担心 CORS、绝对路径和公共仓库:客户端会处理一切——只要你设置了正确的 URL。粘贴之前创建的 blueprint.json 文件的内容。更改任何前面的 HTML 标记和 CSS 样式以满足你的需求。
实时测试
Playground 的 JavaScript API 使用 ES 模块,这意味着你需要在浏览器中运行 index.html 时使用本地服务器。要启动一个简单的开发服务器,请打开终端并输入以下任一命令:
– 对于 PHP:php -S localhost:8000
– 对于 NodeJS:npx serve
在你将所有内容上传到 GitHub 并将仓库连接到自定义域名和托管提供商后,你可以通过你的域名访问和分享完整的演示,指向你的 index.html 文件的路径(https://www.example.com/playground/)。
这是原始项目的样子:
轮到你了
现在你已经准备就绪——既有代码示例,又对每一行代码的作用有了更深入的理解——是时候创建你的项目了:上传你自己修改的主题或定制插件,思考如何最好地生成文章,使用 wp-cli 更改站点设置、设置用户(以及更高级的场景),并思考在基于 HTML 的演示本身中你还能做些什么。
比如,在同一页面上加载多个实例,每个实例并排显示不同的样式变体?或者,准备一个实时教程,教授如何编辑模板页面,并在下方加载一个 Playground iframe,要求学生重新创建它,并在 GitHub 上分享他们的结果(使用 UI 中的 Export Pull Request to GitHub 选项)?
JavaScript API 支持更高级的用例,因此请查看 本系列的第一部分 以了解 Playground 的其他可能性,探索 蓝图示例、演示和应用程序 以获取灵感,然后开始动手吧。