打造你的第一个AI驱动的WordPress插件
最近两个主要的WordPress发布为希望在WordPress环境中探索AI的开发者带来了重要的新功能:
- Abilities API ——一种注册功能单元的标准方式,使得任何东西(REST、块编辑器、其他开发者、AI代理)都能发现并运行。
- WordPress AI 客户端——一个与供应商无关的 PHP 库,用于与任何 AI 模型交互,因此你的代码无需在意哪个 AI 提供商可用。
- MCP 适配器——它将能力作为 MCP 工具暴露,以便 AI 代理(桌面或云端)可以使用它们。
到目前为止,你可能已经看过多个教程,教你如何分别使用这些设备。我们甚至在WordPress开发者博客中详细介绍了这些:
现实是,虽然这些都很有趣,但真正意义非凡的是把它们缝合在一起时。
如果你一直在看Core AI项目的发布,并且想知道这些部分如何组合成一个真正的插件,那么这篇文章就是为你准备的。我们将一步步共同构建一个,重点介绍如何实现这三种人工智能构建模块中的每一个。
如果你是第一次学习这些概念,我们建议你回头阅读上面链接的三篇帖子,然后再回来这里。
目录
- 我们正在建设的
- 开始之前
- 将您的网站与AI服务提供商连接起来
- 构建插件功能
- 第一步:注册能力
- 第二步:把能力挂钩上去
- 第三步:在REST上检查你的作业
- 第四步:描述图片(你的第一个AI调用)
- 步骤5:生成帖子副本
- 第六步:组合能力(好的部分)
- 步骤7:更新管理界面
- 第八步:交给AI代理(MCP)
- 总结
该教程内容也在2026年欧洲词语营(WordCamp Europe)的研讨会上进行了展示。如果你喜欢通过视频学习,可以在 WordPress.tv 观看录像。
我们正在建设的
这个插件叫做“照片到发布”,思路很简单。你给它一个图片的网址,以及插件:
- 利用AI视觉模型查看图像并生成文本描述。
- 根据该图片描述创建草稿——标题和内容。
- 更新草稿帖子,将原始图片设置为帖子的特色图片。
有趣的不是它做了什么。这就是它的建造方式。底层,照片发布包含三种可组合的WordPress功能,分别调用WordPress AI客户端:
| 能力 | 它的作用 | 人工智能能力 |
|---|---|---|
describe-image | 图片网址→文本描述 | 视觉(图像输入) |
generate-post-from-description | 帖子标题→描述 + 内容 | 文本生成 |
create-post-from-photo | 协调上述两项,然后创建帖子 | 这部没有AI,但它指挥着其他作品 |
第三个能力是能力组合的一个例子——一个能力通过 调用其他能力。这是 Abilities API 相比传统 WordPress 功能构建方法更令人兴奋的方面之一。WP_Ability::execute()
开始之前
为了运行本教程的代码,你需要在本地电脑上准备几样东西:
为了简化流程(并简化教程),你将基于此处提供的入门插件:https://github.com/wptrainingteam/wp-ai-workshop-demo/releases。这个插件已经包含了功能集的基础,所以你可以直接构建AI功能。
下载该插件的最新版本(1.1.1),在本地的WordPress开发环境中安装并激活它。
一旦激活,插件会在工具下添加一个名为 WP AI Workshop Demo 的新管理员页面,显示一个用于管理照片到后期流程的表单。
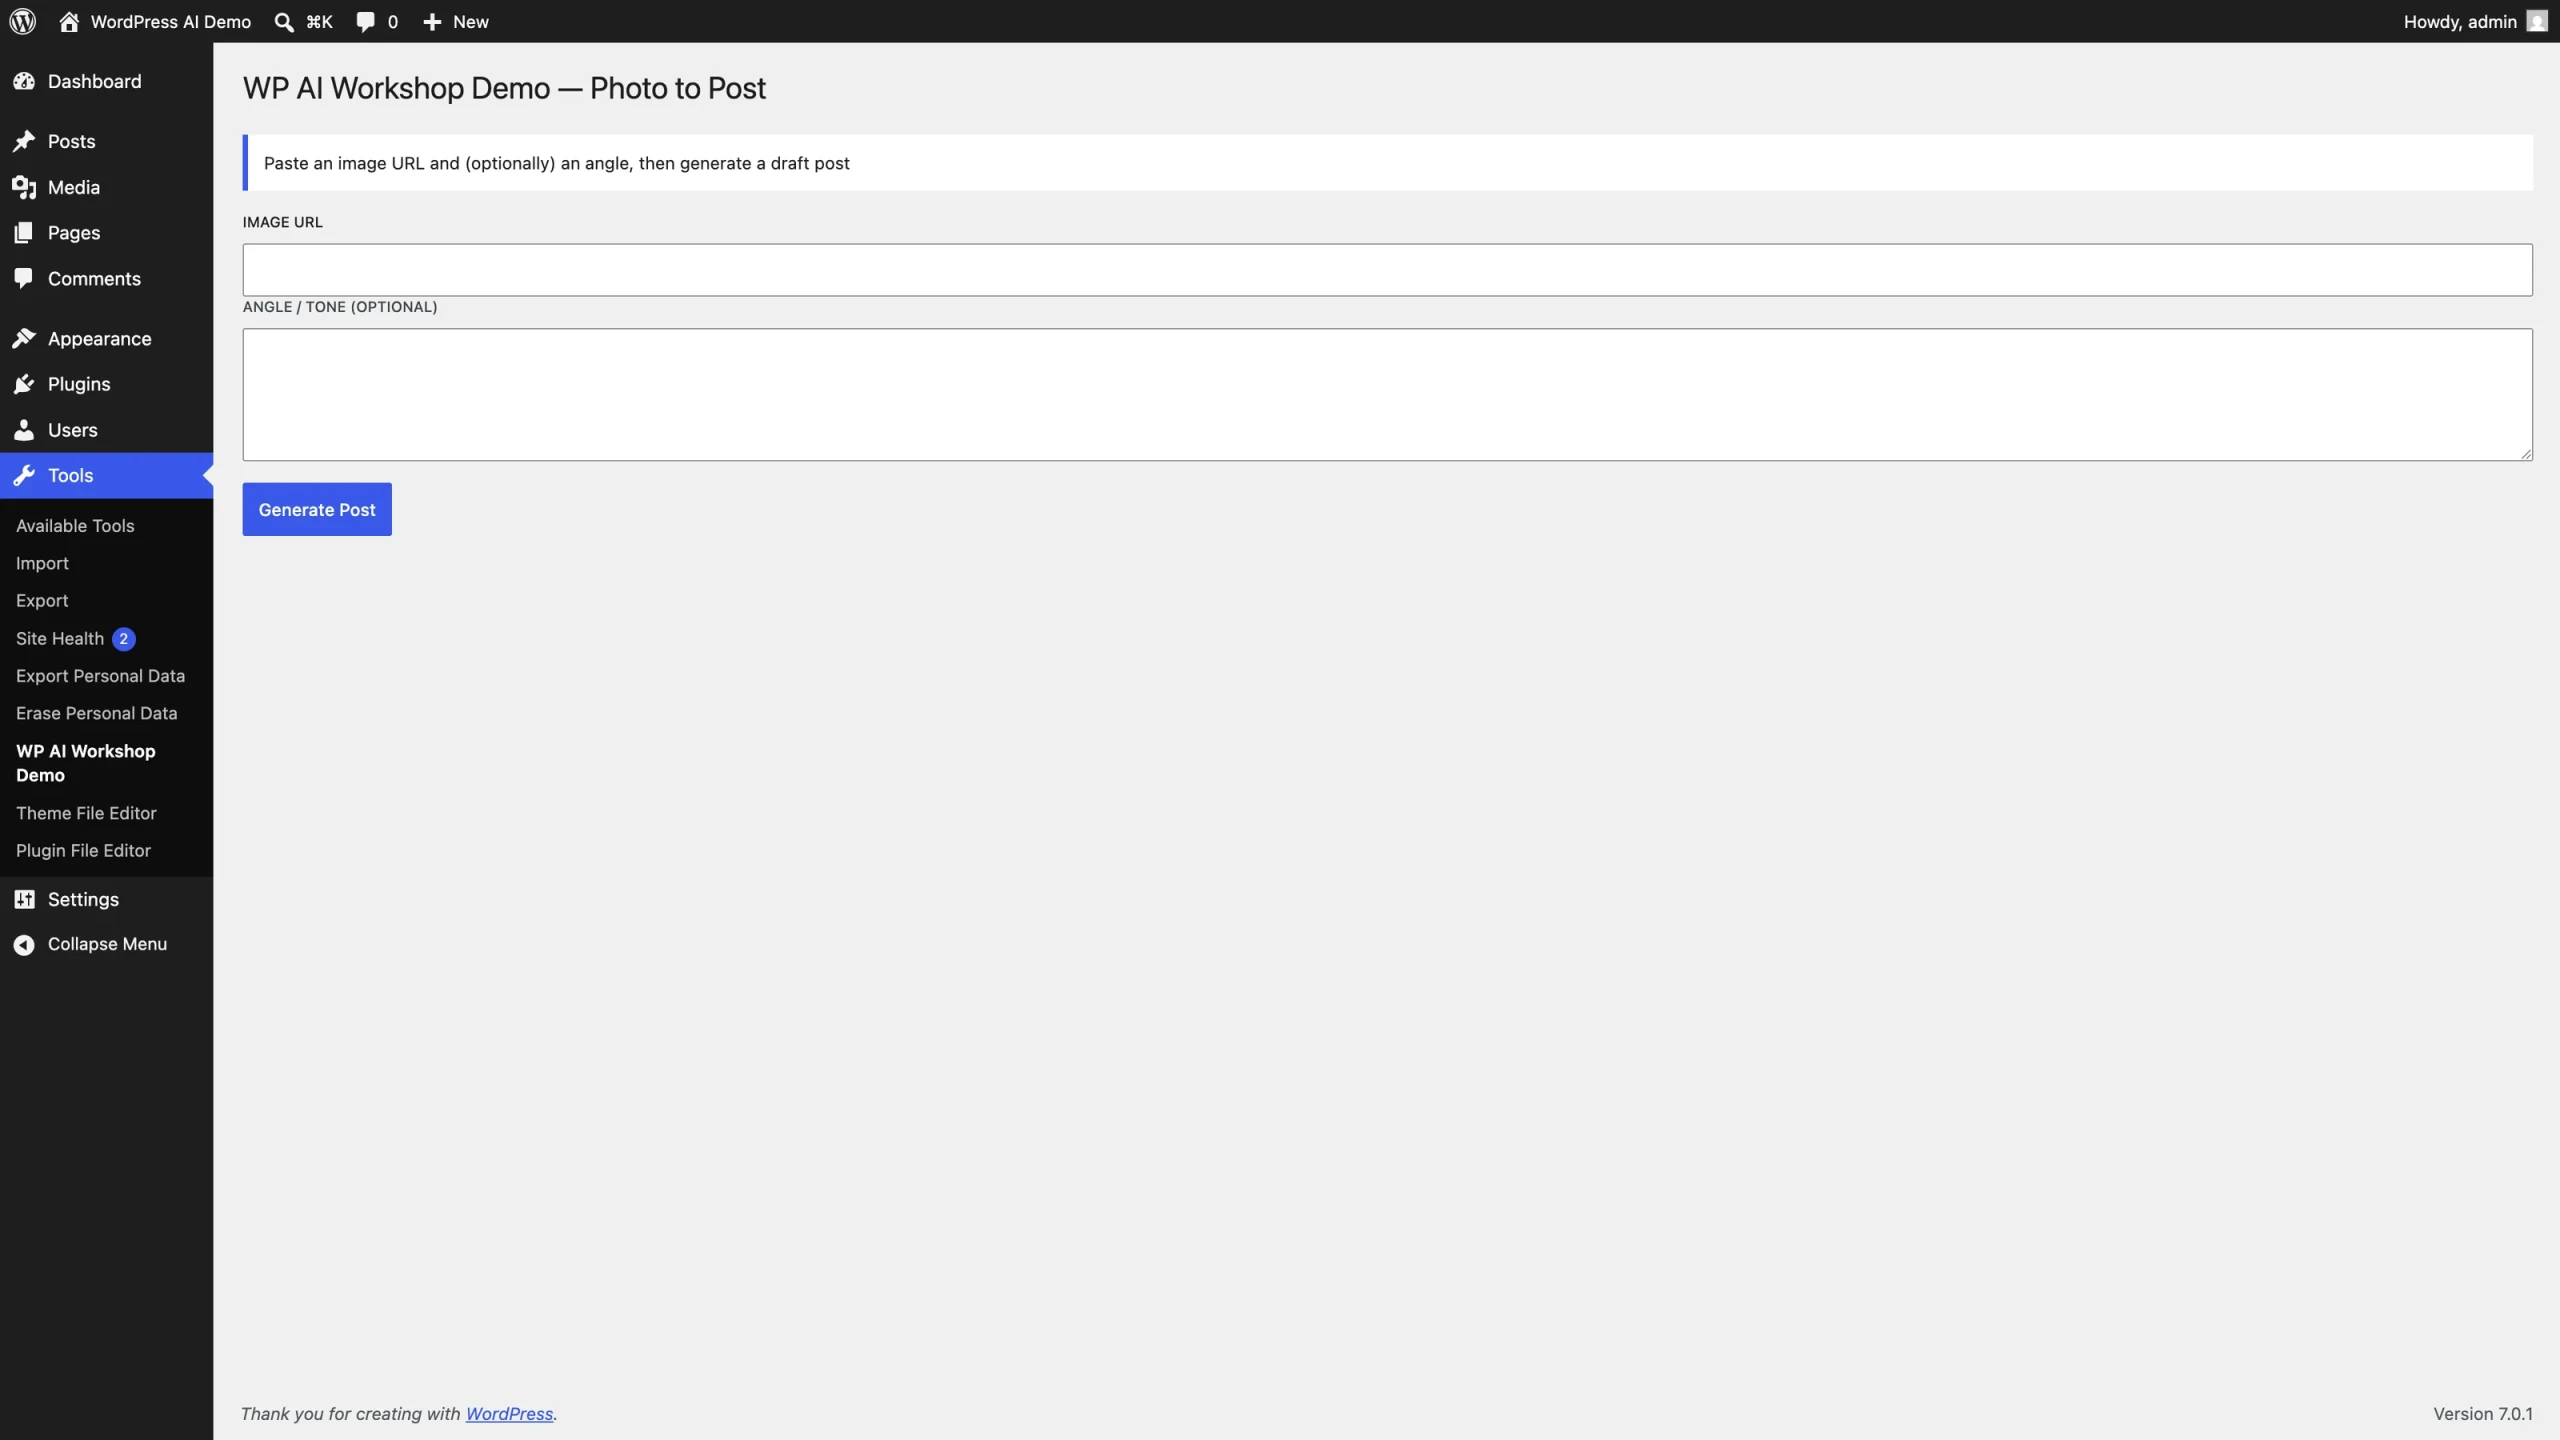
它使用 WordPress DataForm 包来渲染表单,但目前没有提供任何功能。
既然我们要构建这个教程的功能,现在安装composer和npm依赖会很有帮助。在插件目录内,运行:
composer install
npm install
打开主插件文件,你会看到几个标记为 的注释,比如第29行的这条:wp-ai-workshop-demo.phpTODO
// TODO: Register the ability category and the three Photo to Post ability hooks.这表示插件中将构建该功能的各个区域。每次这个教程让你在文件中添加代码时,找具体的替换代码。TODO
将您的网站与AI服务提供商连接起来
要让你的WordPress网站通过AI客户端使用生成式AI,你需要将其连接到AI提供商。在这种情况下,阅读照片、生成描述以及生成帖子内容的过程都使用了 AI 客户端。
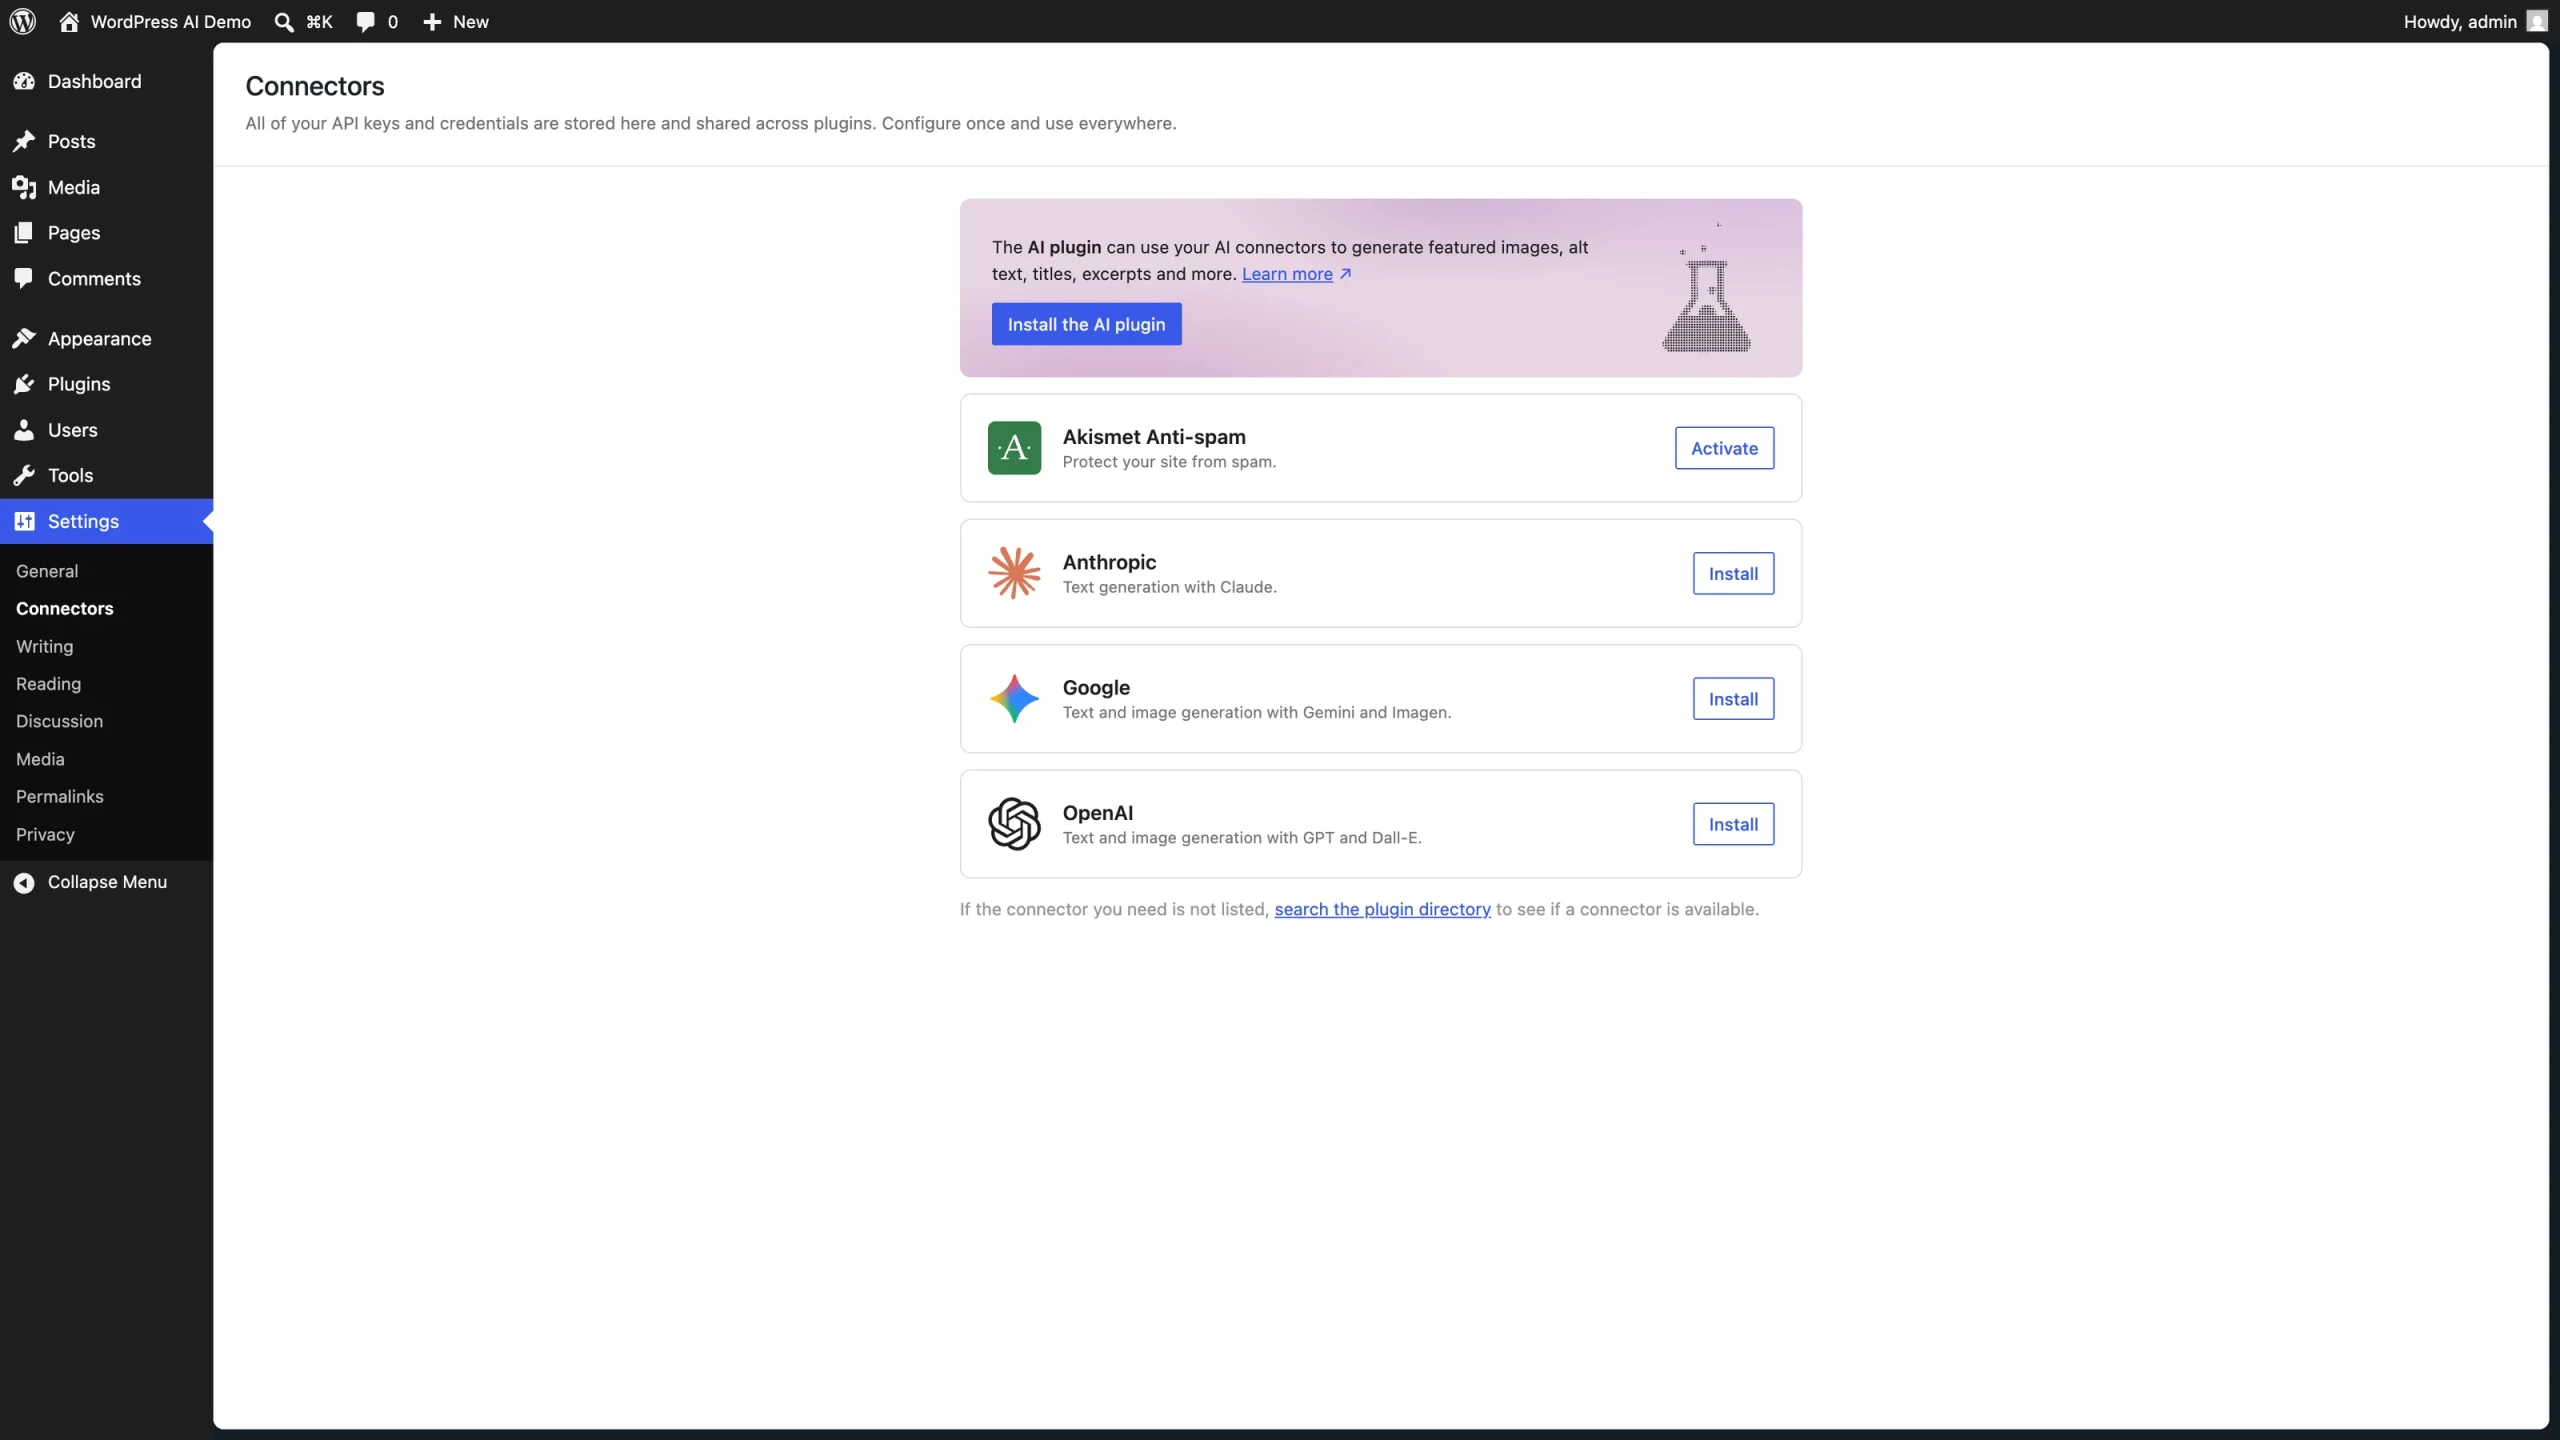
自 WordPress 7.0 起,这可以通过设置菜单中的新连接器界面实现。连接器界面由连接器 API 驱动,为 WordPress 站点管理员提供了一个存储外部 API 密钥的单一界面。
以前,任何添加外部连接的插件都需要WordPress站点管理员存储API密钥以启用连接。其中一些较常见的例子包括:
- Akismet 用于反垃圾邮件
- WordPress版Mailchimp,添加Mailchimp邮件支持
- Google 网站工具包,提供 Google Analytics 信息
- WooCommerce 支付网关扩展(例如 Stripe、PayPal、Authorize.net)
插件开发者通常需要自己管理存储API密钥,通常放在另一个设置页面。所以如果你有4个不同的插件存储API密钥,那就意味着你有4个不同的地方可以管理它们。
连接器的API和界面将所有这些信息集中到一个地方。开发者可以为其插件提供的服务注册一个连接器,连接器会出现在连接器页面,用户可以输入并存储他们的 API 密钥。
在人工智能服务提供商的背景下,存在插件支持三大前沿服务提供商:OpenAI、Anthropic和Google。在连接器页面,你可以安装你选择的供应商的插件
安装后,你可以输入并保存API密钥,以启用AI客户端功能。
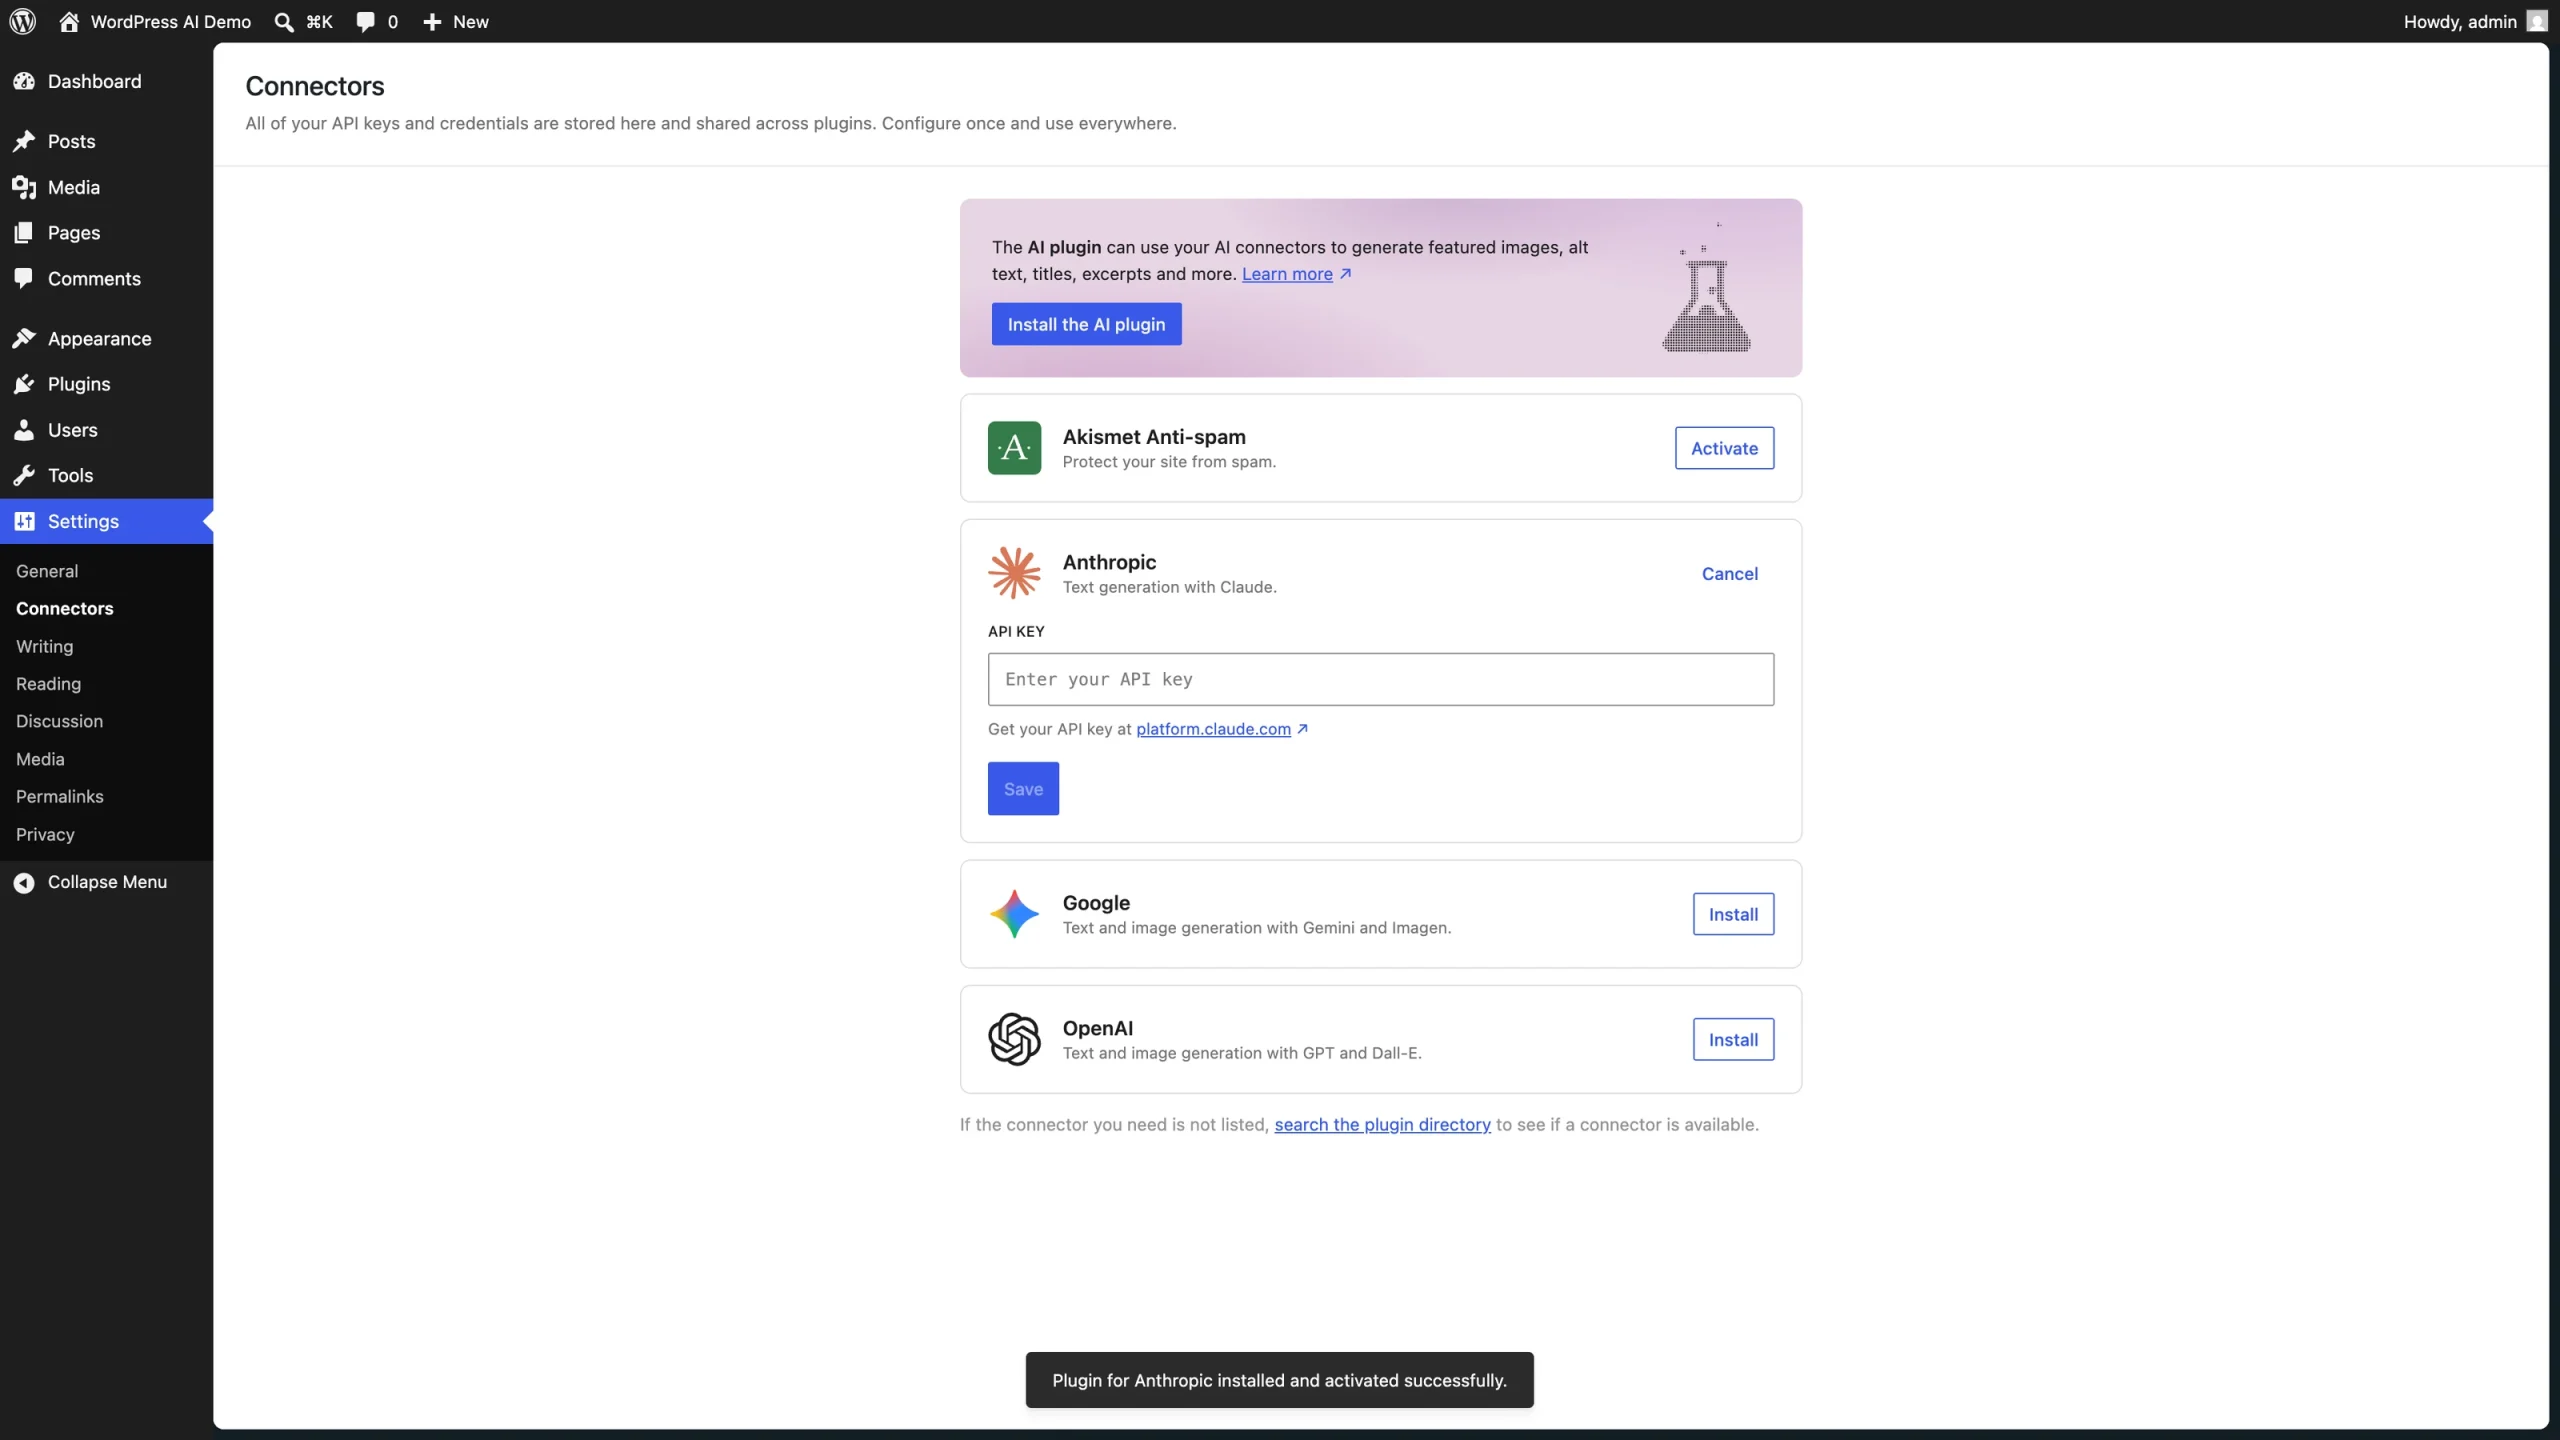
如果你更喜欢使用OpenAI、Anthropic或Google以外的AI模型,还有其他几个供应商的插件,包括Ollama、OpenRouter和Mistral。只要确保你的服务提供者为你将要构建的功能使用具备视觉能力的模型即可。
Building the plugin functionality
With your AI provider connected, you can now start building out all the plugin features.
第一步:注册能力
能力只是插件能做的事情的注册描述:标签、描述、输入模式、输出模式、权限检查和回调,完成实际工作。你将完成所有能力注册。档案。includes/abilities.php
首先,你需要注册一个类别,用函数来组合你的能力。在函数内部,注册类别:wp_register_ability_categorywp_ai_workshop_demo_register_ability_categories
wp_register_ability_category(
    'wp-ai-workshop-demo',
    array(
        'label'       => __( 'WP AI Workshop Demo', 'wp-ai-workshop-demo' ),
        'description' => __( 'Abilities for the WP AI Workshop Demo.', 'wp-ai-workshop-demo' ),
    )
);然后你可以用函数注册第一个能力,,。注意这些内容有多少只是描述能力——输入和输出模式告诉所有消耗能力的设备该发送什么,期望回应什么。将此功能添加到:describe-imagewp_register_abilitywp_ai_workshop_demo_register_describe_image_ability
wp_register_ability(
    'wp-ai-workshop-demo/describe-image',
    array(
        'label'               => __( 'Describe an image via AI', 'wp-ai-workshop-demo' ),
        'description'         => __( 'Given an image URL, use AI vision to produce a detailed text description of the image.', 'wp-ai-workshop-demo' ),
        'category'            => 'wp-ai-workshop-demo',
        'input_schema'        => array(
            'type'       => 'object',
            'properties' => array(
                'image_url' => array(
                    'type'        => 'string',
                    'description' => 'The URL of the image to describe.',
                ),
            ),
            'required'   => array( 'image_url' ),
        ),
        'output_schema'       => array(
            'type'       => 'object',
            'properties' => array(
                'description' => array(
                    'type'        => 'string',
                    'description' => 'A detailed description of the image.',
                ),
            ),
            'required'   => array( 'description' ),
        ),
        'execute_callback'    => 'wp_ai_workshop_demo_describe_image',
        'permission_callback' => function () {
            return current_user_can( 'edit_posts' );
        },
        'meta'                => array(
            'show_in_rest' => true,
        ),
    )
);能力和模式完全相同——只是模式和回调发生了变化。generate-post-from-descriptioncreate-post-from-photo
首先,函数:wp_ai_workshop_demo_register_generate_post_from_description_ability
wp_register_ability(
    'wp-ai-workshop-demo/generate-post-from-description',
    array(
        'label'               => __( 'Generate post copy from a description', 'wp-ai-workshop-demo' ),
        'description'         => __( 'Given a description (and optional tone/angle), generate a WordPress post title and body content.', 'wp-ai-workshop-demo' ),
        'category'            => 'wp-ai-workshop-demo',
        'input_schema'        => array(
            'type'       => 'object',
            'properties' => array(
                'description' => array(
                    'type'        => 'string',
                    'description' => 'The source description to base the post on.',
                ),
                'prompt'      => array(
                    'type'        => 'string',
                    'description' => 'Optional tone, angle, or extra guidance for the post.',
                ),
            ),
            'required'   => array( 'description' ),
        ),
        'output_schema'       => array(
            'type'       => 'object',
            'properties' => array(
                'title'   => array(
                    'type'        => 'string',
                    'description' => 'The generated post title.',
                ),
                'content' => array(
                    'type'        => 'string',
                    'description' => 'The generated post content in Block Editor markup.',
                ),
            ),
            'required'   => array( 'title', 'content' ),
        ),
        'execute_callback'    => 'wp_ai_workshop_demo_generate_post_from_description',
        'permission_callback' => function () {
            return current_user_can( 'edit_posts' );
        },
        'meta'                => array(
            'show_in_rest' => true,
        ),
    )
);随后是函数:wp_ai_workshop_demo_register_create_post_from_photo_ability
wp_register_ability(
    'wp-ai-workshop-demo/create-post-from-photo',
    array(
        'label'               => __( 'Create a post from a photo via AI', 'wp-ai-workshop-demo' ),
        'description'         => __( 'Given an image URL, describe the image, write a post about it, and create a draft post using the image as the featured image.', 'wp-ai-workshop-demo' ),
        'category'            => 'wp-ai-workshop-demo',
        'input_schema'        => array(
            'type'       => 'object',
            'properties' => array(
                'image_url' => array(
                    'type'        => 'string',
                    'description' => 'The URL of the image to turn into a post.',
                ),
                'prompt'    => array(
                    'type'        => 'string',
                    'description' => 'Optional tone, angle, or extra guidance for the post.',
                ),
            ),
            'required'   => array( 'image_url' ),
        ),
        'output_schema'       => array(
            'type'       => 'object',
            'properties' => array(
                'message' => array(
                    'type'        => 'string',
                    'description' => 'A status message describing the result.',
                ),
                'post_id' => array(
                    'type'        => 'integer',
                    'description' => 'The ID of the newly created post.',
                ),
            ),
            'required'   => array( 'message' ),
        ),
        'execute_callback'    => 'wp_ai_workshop_demo_create_post_from_photo',
        'permission_callback' => function () {
            return current_user_can( 'edit_posts' );
        },
        'meta'                => array(
            'show_in_rest' => true,
        ),
    )
);这里需要内化的关键是能力形状:标签、描述、模式、权限、回调。一旦你明白了,你就能在睡觉中感知能力。
那么,为什么要费心用这么正式的方式描述一切呢?这些 、 和 让 REST API、其他开发者和 AI 代理都能理解你的能力,而无需你写额外的代码。你曾经描述过;所有想使用它的人都能立刻理解它的名称、功能、预期输入以及将返回的输出。labeldescriptioninput_schema,output_schema
Step 2: Hook the abilities in
Like most things in WordPress, Ability registration occurs via dedicated action hooks: and .wp_abilities_api_categories_initwp_abilities_api_init
In the main plugin file, , wire up the functions from the file to the relevant hook:wp-ai-workshop-demo.phpincludes/abilities.php
add_action( 'wp_abilities_api_categories_init', 'wp_ai_workshop_demo_register_ability_categories' );
add_action( 'wp_abilities_api_init', 'wp_ai_workshop_demo_register_describe_image_ability' );
add_action( 'wp_abilities_api_init', 'wp_ai_workshop_demo_register_generate_post_from_description_ability' );
add_action( 'wp_abilities_api_init', 'wp_ai_workshop_demo_register_create_post_from_photo_ability' );
Step 3: Check your work over REST
Here’s one of my favorite things about the Abilities API — the moment you register an ability with , it’s exposed over the REST API to authenticated users, no extra code needed. Make sure your local site has Permalinks set to anything other than “Plain”, or the REST endpoints won’t resolve.'show_in_rest' => true
To test this, create an Application Password for your admin user, then test it using something like in the terminal:curl
curl -u 'USERNAME:APPLICATION_PASSWORD' https://yoursite.local/wp-json/wp-abilities/v1/abilitiesYou should see a JSON response which includes the three core WordPress abilities, followed by your three abilities.wp-ai-workshop-demo/*
This is incredibly reassuring as a checkpoint. You haven’t written any internal functionality for these Abilities yet, but you already have three discoverable, schema-described endpoints.
Step 4: Describe the image (your first AI call)
Now for the fun part. You will need to implement the functionality for all Ability execute callback functions, which is where you’ll connect to and use the AI providers.
Start with , which executes the Ability. This happens in the . File, and it’s where you make your first call to the WordPress AI Client.wp_ai_workshop_demo_describe_imagewp-ai-workshop-demo/describe-imageincludes/vision.php
$image_url = $arguments['image_url'];

// Vision-capable providers (e.g. Anthropic) require the image to be sent
// inline (base64), not as a remote URL, so fetch it and build a data URI.
// A data URI is also accepted by URL-friendly providers such as OpenAI,
// which keeps this ability portable across providers.
$data_uri = wp_ai_workshop_demo_image_url_to_data_uri( $image_url );
if ( is_wp_error( $data_uri ) ) {
    return $data_uri;
}

$prompt  = 'Describe this image in detail for someone who cannot see it. ';
$prompt .= 'Focus on the main subject, the setting, the mood, notable colours, ';
$prompt .= 'and any details that would help someone write an engaging blog post about it.';

$description = wp_ai_client_prompt()
    ->with_text( $prompt )
    ->with_file( $data_uri )
    ->generate_text();

if ( is_wp_error( $description ) ) {
    return $description;
}

return array(
    'description' => trim( $description ),
);
看看那个AI客户端通话有多易读。 给你一个流利的构建器:添加提示文本,附加文件,要求回文本。而且由于 AI 客户端是与提供者无关的,无论用户配置 OpenAI、Anthropic 还是 Google,这段代码都能正常使用。wp_ai_client_prompt()
你还需要添加辅助功能。它会获取带有 base64 的远程图像,并将其编码为数据 URI 发送给 AI 模型。wp_ai_workshop_demo_image_url_to_data_uri()wp_remote_get()
信息:一般来说,开发者喜欢把这类辅助功能放在插件里的单独文件里。在这个教程中,你可以直接在相关文件底部添加任何辅助函数。
/**
 * Fetch a remote image and return it as a base64-encoded data URI.
 *
 * @param string $image_url The URL of the image to fetch.
 * @return string|WP_Error The data URI on success, or WP_Error on failure.
 */
function wp_ai_workshop_demo_image_url_to_data_uri( $image_url ) {
    $response = wp_remote_get(
        $image_url,
        array(
            'timeout'    => 30,
            'user-agent' => 'WP-AI-Workshop-Demo/1.0; ' . home_url( '/' ),
        )
    );
    if ( is_wp_error( $response ) ) {
        return $response;
    }

    $code = (int) wp_remote_retrieve_response_code( $response );
    if ( 200 !== $code ) {
        return new WP_Error(
            'image_fetch_failed',
            sprintf( 'Could not fetch the image (HTTP %d).', $code )
        );
    }

    $body = wp_remote_retrieve_body( $response );
    if ( '' === $body ) {
        return new WP_Error( 'image_fetch_empty', 'The fetched image was empty.' );
    }

    $mime = wp_remote_retrieve_header( $response, 'content-type' );
    if ( ! is_string( $mime ) || 0 !== strpos( $mime, 'image/' ) ) {
        $filetype = wp_check_filetype( $image_url );
        $mime     = ! empty( $filetype['type'] ) ? $filetype['type'] : 'image/jpeg';
    }

    return 'data:' . $mime . ';base64,' . base64_encode( $body );
}
这里有两点需要注意:
wp_ai_client_prompt()->generate_text()失败时返回 A ——不会抛出异常。AI客户端的WordPress包装器会帮你捕捉异常,并返回一个。所以一定要检查 。WP_ErrorWP_Erroris_wp_error()- 像Anthropic这样的视觉服务提供商希望图像以base64形式内联发送,而不是远程网址。这就是为什么你会抓数据并构建数据URI。发送URL在某些服务商上有效,在另一些服务商上失败——数据URI使其最具可移植性。
步骤5:生成帖子副本
下一个能力执行回调以更新,位于 。这个功能会发出第二个 AI 调用,将描述转化为帖子标题和正文。注意提示如何要求 AI 返回一个特定的 JSON 对象,从而更容易返回标题和内容。wp_ai_workshop_demo_generate_post_from_descriptionincludes/content.php
$description = $arguments['description'];
$guidance    = ! empty( $arguments['prompt'] ) ? trim( $arguments['prompt'] ) : '';

$prompt = 'Write an engaging WordPress blog post inspired by the following image description.';
if ( '' !== $guidance ) {
    $prompt .= ' Tone, angle, or extra guidance: ' . $guidance . '.';
}
$prompt .= ' Image description: ' . $description;
$prompt .= ' Respond with a single JSON object containing exactly two keys: ';
$prompt .= '"title" (a short, compelling post title as plain text) and ';
$prompt .= '"content" (the full post body using valid WordPress Block Editor markup). ';
$prompt .= 'Do not wrap the response in markdown code fences.';

$text = wp_ai_client_prompt( $prompt )->generate_text();

if ( is_wp_error( $text ) ) {
    return $text;
}

$data = wp_ai_workshop_demo_decode_json_response( $text );

if ( ! is_array( $data ) || empty( $data['title'] ) || empty( $data['content'] ) ) {
    return new WP_Error(
        'post_copy_parse_failed',
        'The AI response could not be parsed into a title and content.'
    );
}

return array(
    'title'   => trim( $data['title'] ),
    'content' => trim( $data['content'] ),
);你还会添加一个辅助功能,在解码前有意剥离模型可能围绕JSON的markdown代码障碍。wp_ai_workshop_demo_decode_json_response()
/**
 * Decode a JSON object from an AI text response, tolerating markdown fences.
 *
 * @param string $text The raw text returned by the AI.
 * @return array|null Decoded associative array, or null if no JSON could be parsed.
 */
function wp_ai_workshop_demo_decode_json_response( $text ) {
    $text = trim( $text );

    $text = preg_replace( '/^\s*```(?:[a-z0-9_-]+)?\s*/i', '', $text );
    $text = preg_replace( '/\s*```\s*$/i', '', $text );
    $text = trim( $text );

    $data = json_decode( $text, true );
    if ( is_array( $data ) ) {
        return $data;
    }

    if ( preg_match( '/\{.*\}/s', $text, $matches ) ) {
        $data = json_decode( $matches[0], true );
        if ( is_array( $data ) ) {
            return $data;
        }
    }

    return null;
}
你可能会想,既然提示明确说不要这样做,为什么还要添加这个。关于要求语言模型提供干净的JSON,有一点是:它大多会遵守,直到不符合。AI模型不是确定性的,意味着它们不遵循一套固定的规则。相反,它们识别模式并计算下一次输出的数学似然度。因此,每次问AI完全相同的问题,可能会得到不同的回答。所以,在这里加上防御检定并解析AI的数据,确保每次都能得到正确的反应类型。
第六步:组合能力(好的部分)
现在说说真正有趣的部分。文件内部是插件功能的核心 。在这里,该编排函数可以调用另外两种能力。includes/post.phpwp_ai_workshop_demo_create_post_from_photo
$image_url = $arguments['image_url'];
$prompt    = isset( $arguments['prompt'] ) ? $arguments['prompt'] : '';

// Step 1: Describe the image (ability composition).
$describe_ability = wp_get_ability( 'wp-ai-workshop-demo/describe-image' );
if ( ! $describe_ability instanceof WP_Ability ) {
    return array( 'message' => 'Post creation failed: the describe-image ability is not available.' );
}
$description_result = $describe_ability->execute( array( 'image_url' => $image_url ) );
if ( is_wp_error( $description_result ) ) {
    return array( 'message' => 'Post creation failed while describing the image: ' . $description_result->get_error_message() );
}

// Step 2: Generate the post title and content (ability composition).
$generate_ability = wp_get_ability( 'wp-ai-workshop-demo/generate-post-from-description' );
if ( ! $generate_ability instanceof WP_Ability ) {
    return array( 'message' => 'Post creation failed: the generate-post-from-description ability is not available.' );
}
$copy_result = $generate_ability->execute(
    array(
        'description' => $description_result['description'],
        'prompt'      => $prompt,
    )
);
if ( is_wp_error( $copy_result ) ) {
    return array( 'message' => 'Post creation failed while writing the post: ' . $copy_result->get_error_message() );
}

// Step 3: Create the draft post and set the featured image.
return wp_ai_workshop_demo_create_post(
    $copy_result['title'],
    $copy_result['content'],
    $image_url
);
你看到发生了什么吗? 按名称获取一个能力,并运行它。你的编排器从不直接触碰 AI 客户端;它只是组合两个已经懂得如何完成任务的能力,然后交给一个助手,助手会调用创建帖子,并用助手侧载精选图片。现在是添加这些辅助功能的好时机。wp_get_ability()->execute()wp_ai_workshop_demo_create_post()wp_insert_post()media_sideload_image()
/**
 * Create a draft post and set its featured image from an image URL.
 *
 * @param string $title The Post title.
 * @param string $content The Post content.
 * @param string $image_url The external image url.
 */
function wp_ai_workshop_demo_create_post( $title, $content, $image_url ) {
    $post_id = wp_insert_post(
        array(
            'post_title'   => sanitize_text_field( $title ),
            'post_content' => $content,
            'post_status'  => 'draft',
            'post_type'    => 'post',
        )
    );

    if ( is_wp_error( $post_id ) || 0 === $post_id ) {
        return array( 'message' => 'Post creation failed.' );
    }

    $attachment_id = wp_ai_workshop_demo_set_featured_image_from_url( $post_id, $image_url );
    if ( is_wp_error( $attachment_id ) ) {
        return array(
            'message' => 'Post created, but the featured image could not be added: ' . $attachment_id->get_error_message(),
            'post_id' => $post_id,
        );
    }

    return array(
        'message' => 'Post created successfully with featured image.',
        'post_id' => $post_id,
    );
}

/**
 * Sideload an image from a URL into the media library and set it as the
 * featured image for a post.
 *
 * @param string $post_id ID of the Post.
 * @param string $image_url URL of the external image.
 */
function wp_ai_workshop_demo_set_featured_image_from_url( $post_id, $image_url ) {
    // Verify that the image_url is a valid url, just to be safe.
    if ( ! wp_http_validate_url( $image_url ) ) {
        return new WP_Error( 'invalid_url', 'Image URL failed validation.' );
    }

    // The media_sideload_image() function is typically only used in the admin context
    // This ensures that it can be used outside the admin context, such as in a REST API request or MCP tool.
    if ( ! function_exists( 'media_sideload_image' ) ) {
        require_once ABSPATH . 'wp-admin/includes/media.php';
        require_once ABSPATH . 'wp-admin/includes/file.php';
        require_once ABSPATH . 'wp-admin/includes/image.php';
    }

    $attachment_id = media_sideload_image( $image_url, $post_id, null, 'id' );
    if ( is_wp_error( $attachment_id ) ) {
        return $attachment_id;
    }

    set_post_thumbnail( $post_id, $attachment_id );

    return $attachment_id;
}这是《能力》最棒的地方之一。一旦你的功能被表达为能力,你和其他开发者可以通过结合现有能力来构建新功能——比如乐高积木。正是这种本能让钩子和过滤器如此强大,应用到了新一代的功能中。
步骤7:更新管理界面
到目前为止,你已经完成了大部分核心插件功能。现在我们只需要让网站所有者获得。如前所述,插件自带设置页面,所以我们需要将其连接到刚注册的能力。
第一步是将能力脚本模块排队到:includes/admin.php
wp_enqueue_script_module( '@wordpress/core-abilities' );@wordpress/core-abilities它会排队你在 JavaScript 中查找并执行你在 PHP 中注册的能力所需的所有内容。
接下来,你需要更新插件自身的脚本队列,使其加载为脚本模块,并添加对 的依赖:@wordpress/core-abilities
wp_enqueue_script_module(
    'wp-ai-workshop-demo-script',
    plugins_url( 'build/index.js', __DIR__ ),
    array( '@wordpress/core-abilities' ),
    $asset_file['version'],
);现在打开文件,你将在那里更新设置页面界面。src/components/settings-page.jsx
第一步是导入包装中的承诺。这是最近的一次更新,确保 Abilities REST API 端点在任何模块尝试交互之前都已加载。接着,从包中导入 and functions。这让你能够获得并执行你注册的能力。同时,你可以创建一个常数,包含该能力的名称。ready@wordpress/abilitiesgetAbilityexecuteAbility@wordpress/abilitiescreate-post-from-photo
const { ready } = await import( /* webpackIgnore: true */ '@wordpress/core-abilities' );
await ready;
const { getAbility, executeAbility } = await import( /* webpackIgnore: true */ '@wordpress/abilities' );

const ABILITY = 'wp-ai-workshop-demo/create-post-from-photo';提醒一下:注意评论。它在构建阶段告诉不要捆绑导入,因为WordPress在运行时就已经提供导入。Gutenberg 有开放的 PR 可以修复这个问题,但目前,评论是让构建满意的关键。/* webpackIgnore: true */wp-scriptswp-scripts
然后,在函数内部使用Abilities的JavaScript API来执行该能力。generateFromInputcreate-post-from-photo
       const ability = getAbility( ABILITY );
        if ( ! ability ) {
            updateNotice( __( 'Whoops, the create-post-from-photo Ability was not found.', 'wp-ai-workshop-demo' ), 'error' );
            return;
        }

        setIsBusy( true );
        updateNotice( __( 'Looking at your image and writing a post… this can take a moment.', 'wp-ai-workshop-demo' ), 'info' );

        try {
            const result = await executeAbility( ABILITY, {
                image_url: input.image_url,
                prompt: input.prompt,
            } );

            if ( result && result.post_id ) {
                const editUrl = `post.php?post=${ result.post_id }&action=edit`;
                updateNotice(
                    <span>
                        { ( result.message || __( 'Post created.', 'wp-ai-workshop-demo' ) ) + ' ' }
                        <a href={ editUrl }>{ __( 'Edit the draft post.', 'wp-ai-workshop-demo' ) }</a>
                    </span>,
                    'success'
                );
            } else {
                updateNotice( result && result.message ? result.message : __( 'Done.', 'wp-ai-workshop-demo' ), 'error' );
            }
        } catch ( err ) {
            updateNotice( __( 'Error during post generation. Check the console for details.', 'wp-ai-workshop-demo' ), 'error' );
            console.error( err );
        } finally {
            setIsBusy( false );
        }
这里需要重点关注的关键细节是,就像在 PHP 中一样,你只需按其名称获得一个能力,检查其有效性,然后用所需的输入执行它。在 PHP 和 JavaScript 中执行相同操作无需额外代码。
在终端里,在插件目录里运行,重建资源。npm run build
然后→进入 WP AI Workshop 演示工具,粘贴图片网址,点击生成帖子。你测试过的同一个功能现在也在驱动仪表盘界面。写一次,到处用。curl
一个实际的调整:暂停
Photo to Post 连续进行两次 AI 调用,然后侧载一张图片,因此单个请求很容易运行超过 WordPress 默认的 HTTP 超时时间。幸运的是,AI客户端会暴露一个用于增加超时值的过滤器:
首先添加回调函数来更新超时includes/ai-client.php
function wp_ai_workshop_demo_set_request_timeout() {
    return 120;
}然后,回到主插件文件,把这个功能连接到过滤器,就像你做能力钩子时那样。wp-ai-workshop-demo.php
add_filter( 'wp_ai_client_default_request_timeout', 'wp_ai_workshop_demo_set_request_timeout' );这是那种你不会想到的事情,直到你的第一个真正请求在最糟糕的时刻超时。
第八步:交给AI代理(MCP)
接下来就有点神奇了。我们有能力在 REST 和仪表盘上运行。只需一个小改动,它们也可以由桌面应用中的AI代理驱动。
在能力注册中,更新元数组以增加对MCP的支持。wp-ai-workshop-demo/create-post-from-photo
'meta' => array(
    'show_in_rest' => true,
    'mcp'          => array(
        'public' => true, // Expose this ability via MCP.
    ),
),现在下载、安装并激活你网站上的MCP适配器插件。这会在WordPress网站上创建一个默认的MCP服务器。
使用你之前创建的同一个应用密码,你可以用默认的 WordPress MCP 服务器信息配置你的 AI 代理。下面是一个在 Claude 文件中实现这一过程的示例:~/.config/Claude/claude_desktop_config.json
{
  "mcpServers": {
    "wordpress-ai-demo": {
      "command": "npx",
      "args": [ "-y", "@automattic/mcp-wordpress-remote@latest" ],
      "env": {
        "WP_API_URL": "https://yoursite.local/wp-json/mcp/mcp-adapter-default-server",
        "WP_API_USERNAME": "your-username",
        "WP_API_PASSWORD": "your-application-password"
      }
    }
  }
}
(如果你是VS Code用户,MCP块会被命名,而不是。)serversmcpServers
现在让你的MCP客户“从这张照片创建一条帖子”,并附上图片网址——然后看它自动发现并调用你的能力。同样的能力。三扇不同的前门:REST、仪表盘和一个AI代理。我们从未为任何一个单独编写代码。create-post-from-photo
总结
在WordPress核心AI项目上构建的好处之一是,你无需重新发明任何东西就能为插件添加AI驱动的功能。
你注册了描述插件能做什么的能力。你让AI客户端处理那些复杂的服务商专属细节。你把小能力组合成更大的能力。然后REST、区块编辑器和MCP代理都免费加入了这段旅程。
如果你用它构建了什么东西——或者卡住了——我很乐意在评论区听听你的分享。这就是把这些事情摊开来最棒的地方。现在去开发你的第一个AI驱动插件吧。